Custom HTML splash page templates
Quick start guide
Custom HTML splash page templates are intended for visitors who have a good knowledge of HTML, CSS and JavaScript and want to create a splash page design that cannot be acheived using the standard splash page template designer.
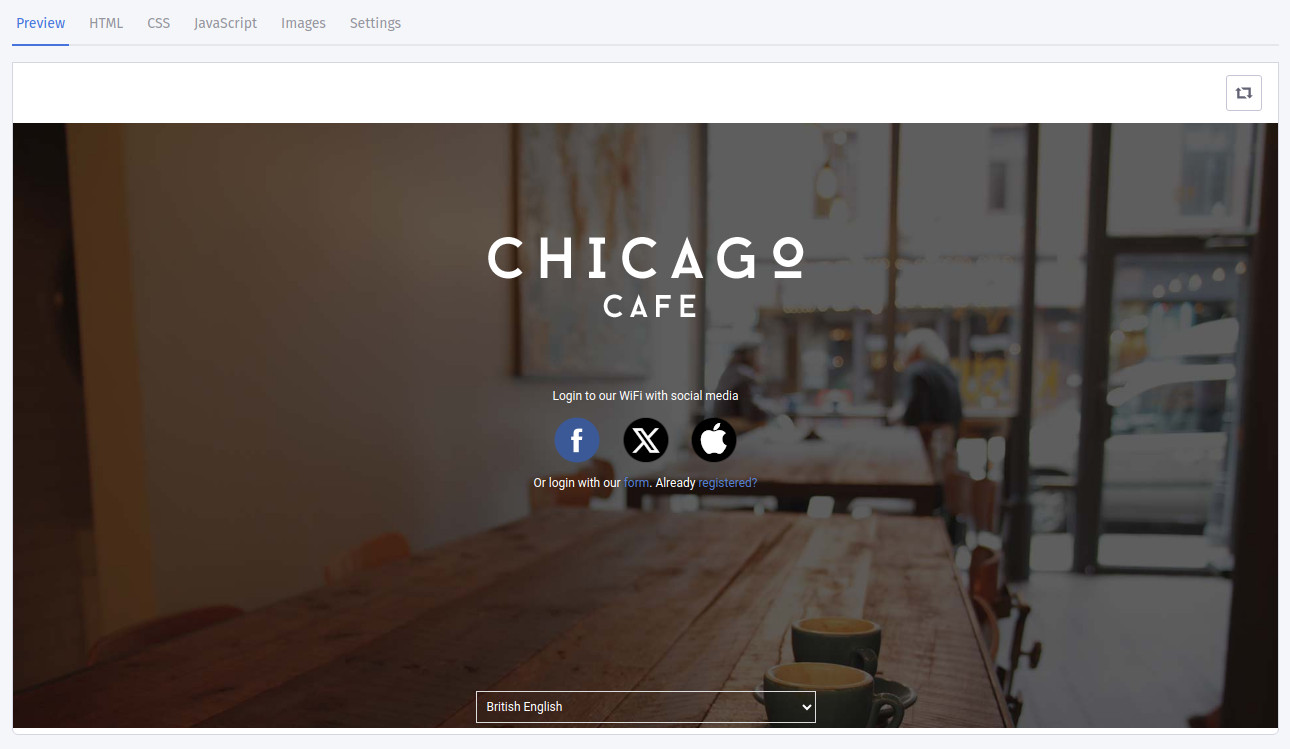
This guide will introduce you to some of the tools available to help you build your custom HTML splash page template and provide you with a practical step by step example of how this can be achieved. In this guide you will create a simple 'offline' custom HTML design for a coffee shop named 'Chicago Cafe'.
This guide contains the following sections:
- Resources for this guide
- Create a new Custom HTML template
- Upload a logo
- Upload custom images
- Add custom CSS
- First HTML changes
- Add custom social media authentication buttons
- Use snippets to activate the social authentication buttons
- Add a registration form link and an embedded login form
- Add custom JavaScript
- End of the guide
- Common questions and answers
-
Resources for this guide
You can download a zip file containing all the resources used in this guide by clicking here.
After downloading the zip file please extract the contents to a directory on your computer where you can access the files.
The zip file also contains the final HTML, CSS and JavaScript source code for the example 'Chicago Cafe' design so please feel free to reference this at any point.
-
Create a new Custom HTML template
Whilst viewing your splash page template list, click on the 'Create new template' found at the top right of the page.
Enter the details for the new template in the window dialogue that appears and ensure that you choose the 'Custom HTML' option in the 'Type' dropdown.
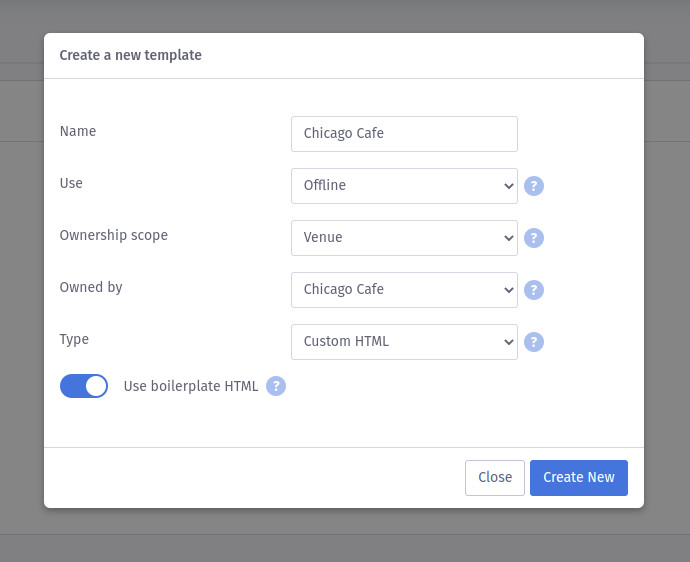
Click on the 'Create New' button to create the new template.
You will then be redirected to the custom HTML splash page template editor where you can edit your new template.
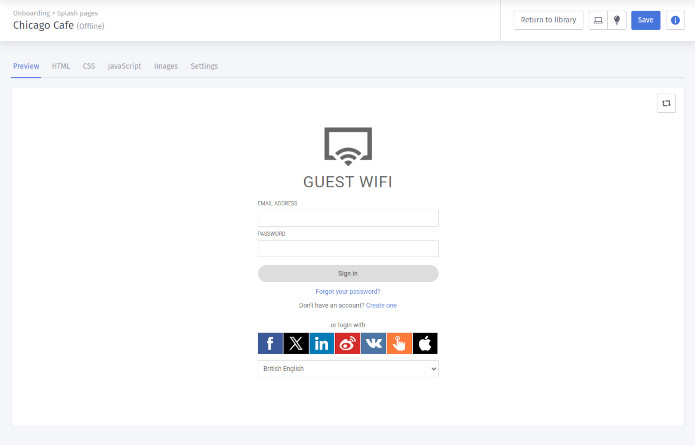
Your new custom HTML template
A responsive, HTML and CSS boilerplate template is applied to each new custom HTML template that you create. This is an example template that you can adapt to suit your needs or completely replace with your own custom HTML, CSS and JavaScript. As this boilerplate template already contains a responsive CSS design we are going to adapt it to create the 'Chicago Cafe' template.
-
Upload a logo
Firstly, we will upload a logo image that we can use in the custom template and that will also be used for the interstitial pages of the WiFi access journey (e.g. the Facebook 'Like' page, additional profile page, SMS authentication page etc). We will also set a background colour that will be used to style the background of headers and buttons on these pages.
Click on the 'Settings' tab in the editor and you should see that there is a section named 'Access journey pages'. Click on the 'Upload logo' button to select and upload your logo image file.
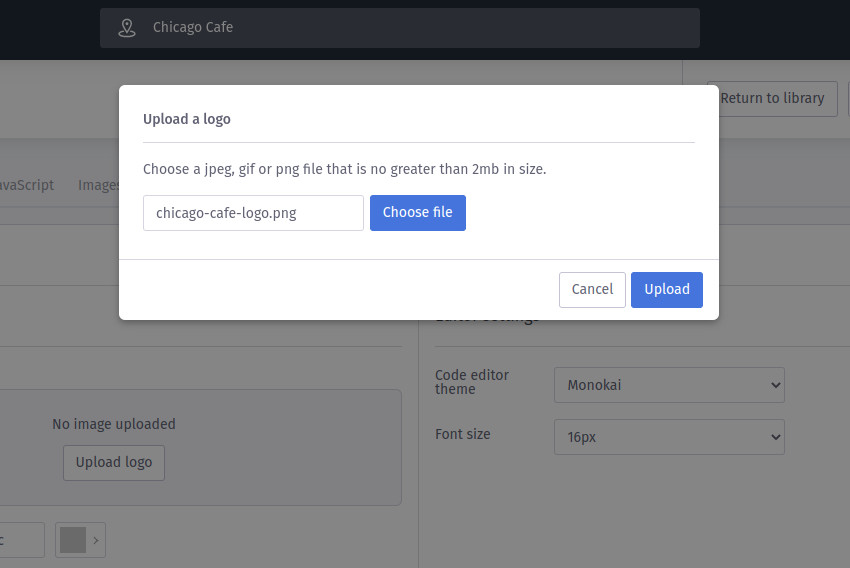
Once you have successfully uploaded your logo, click on the 'Background colour' colour picker drop down and choose a colour.
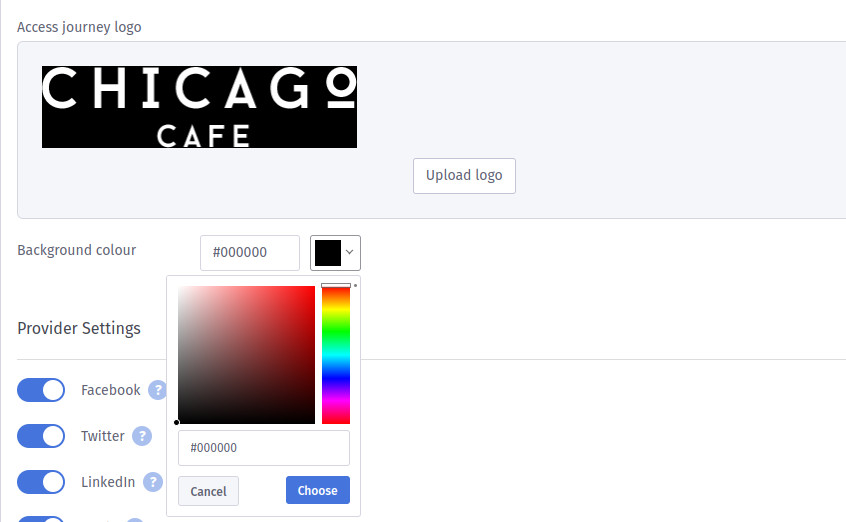
Click on the 'Save' template dropdown and choose 'Save template' to save these changes.
-
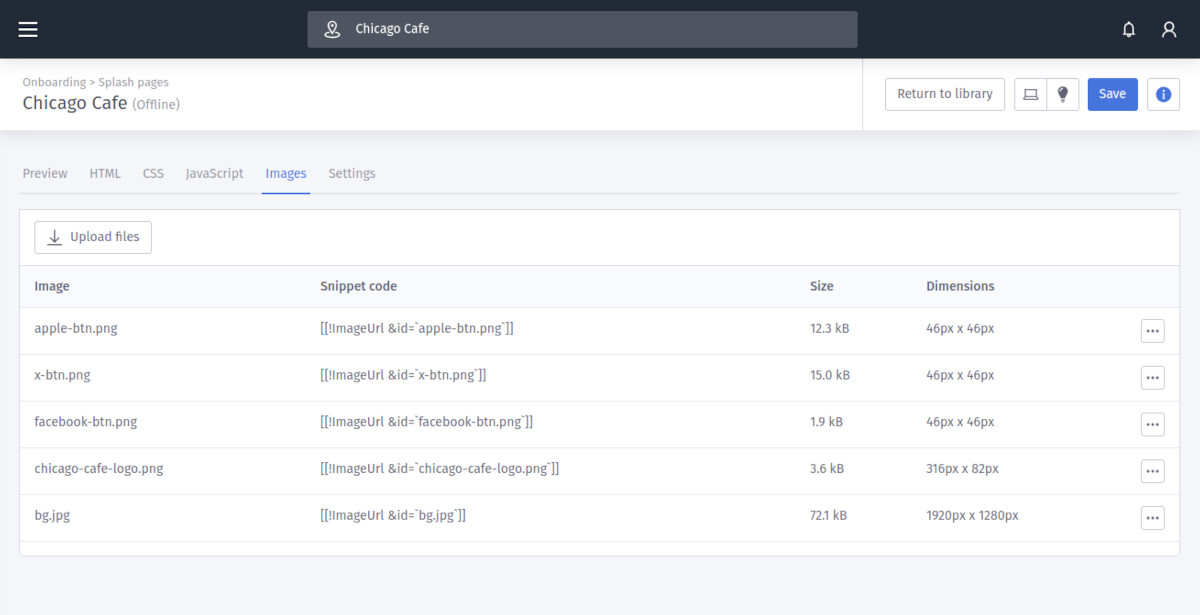
Upload custom images
Next we will upload the remaining images that will be used in our template. These images are used to set the background for the HTML <body> element and to create custom social media authentication buttons.
Click on the 'Images' tab in the editor and click on the 'Upload files' button and upload the background and social media image files.
Once they have been successfully uploaded the images will appear in the list and will be ready for use.
-
Custom CSS
Custom HTML templates allow you to define your own CSS classes and selectors via the 'CSS' tab. You can manually enter styles in the editor within the tab or upload an entire CSS file that you may have developed offline.
To save having to add CSS styles at particular steps in the tutorial we are going to use the CSS file upload facility to upload all the styles for the design. We will upload the final 'styles.css' file that can be found within the zipped tutorial resources that you downloaded.
- Click on the 'CSS' tab in the editor
- Click on the 'Upload file' button located in the upper left corner of the tab
- Click on the 'Choose file' button and locate the 'styles.css' file
- Click on the 'Upload' button to upload the file
Once the file has uploaded successfully you should see that the content of the CSS code editor now contains the content of the uploaded file. The content contains all the css styles for the original 'Guest WiFi' boilerplate design with the addition of some overrides and custom styles for 'Chicago Cafe'.
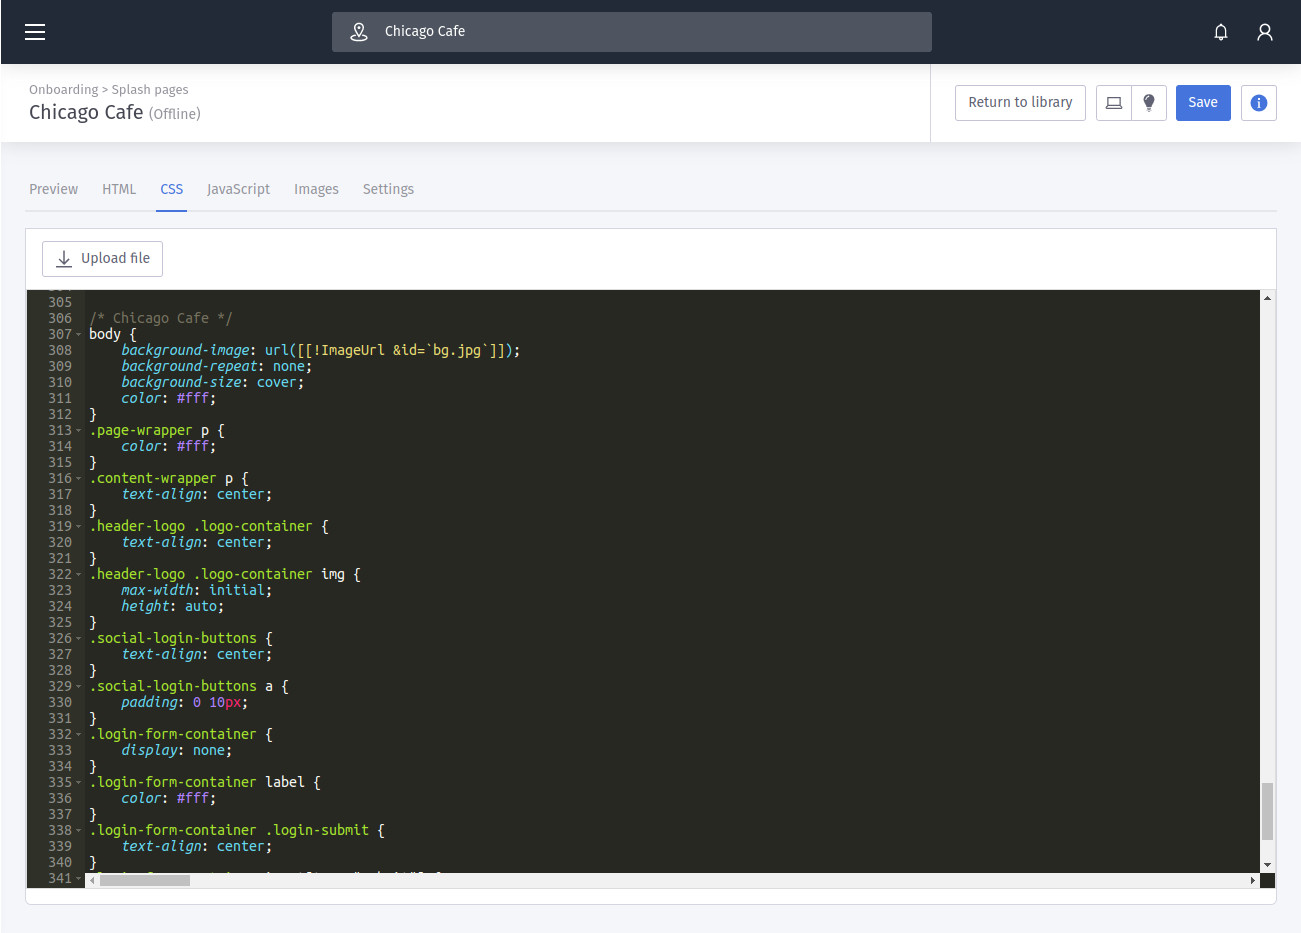
Custom CSS
You can update and add to your custom CSS at any time - click on the 'Preview' tab to preview the changes.
You may also notice that the above screenshot contains a short code named [[!ImageUrl]] where you would normally expect to find a relative or absolute url for the <body> background image. This is a snippet code that we have added to the CSS to embed a url for a 'captive portal' image, in this case the uploaded background image. We'll be looking at embedding snippet codes in the next step.
-
First HTML changes
The first changes that we will make to the boilerplate template are to add the 'Chicago Cafe' logo, remove some of the boilerplate text that is provided in the template and set the document page title.
Add the 'Chicago Cafe' logo
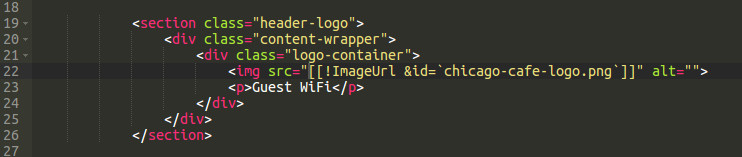
Click on the 'HTML' tab to edit the source HTML of your template and scroll down to the first <section> tag in the HTML. You will see there is an img tag with an 'src' attribute containing a [[!GuestWiFiLogo]] system snippet code.

This snippet embeds a url to the 'Guest WiFi' logo used by the boilerplate template.
What are snippets?
Snippets are reusable pieces of short code that you can embed in your HTML and render HTML directly into your template output at run time. You can find the snippet library in the HTML tab which provides a variety of snippets to render forms and images. If you want to find out more about snippets before moving forward in this guide then there is a 'Help' button next to the 'Show snippets' option in the upper right of the HTML tab that will launch snippet help.
Let's replace the 'Guest WiFi' logo with the logo we uploaded for 'Chicago Cafe' by using the [[!ImageUrl]] snippet.
- Highlight the [[!GuestWiFiLogo]] snippet code text within the 'src' attribute of the image tag (as seen in the image above)
- Within the snippet library to the right of the HTML tab, click on the 'Images' section and then click on 'Image url'.
- In the modal dialogue, choose the 'chicago-cafe-logo.png' image and click 'Embed'
- You should see that the 'src' attribute for the image is now a snippet code that references your uploaded logo image.
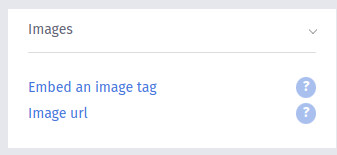
You can add the [[!ImageUrl]] snippet to your HTML, CSS or JavaScript to embed a captive portal url to one of your template images. The 'id' parameter is the 'Image' name that is referenced in your uploaded 'Images' list.
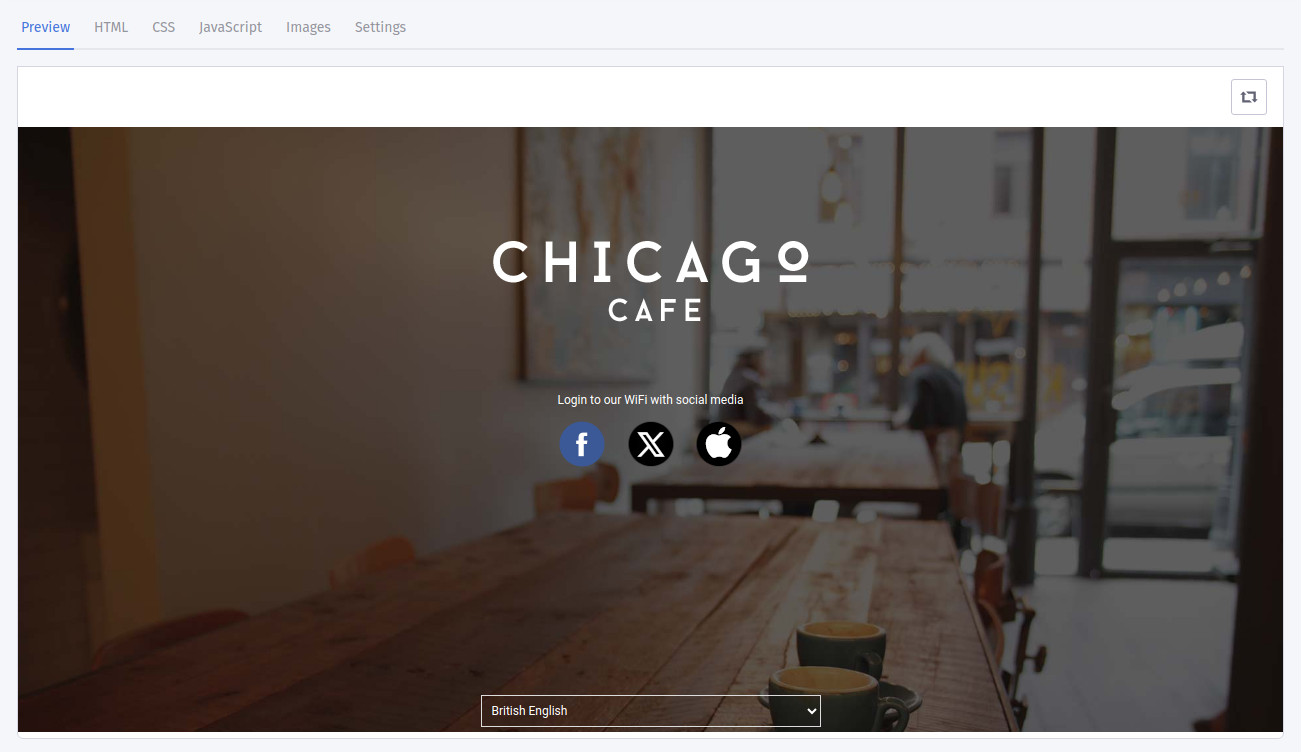
Click on the 'Preview' tab to see the change.
Remove the 'Guest WiFi' text
You'll see that the template currently says 'Guest WiFi' underneath the logo. We're going to remove this from our template simply by removing the relevant HTML tag in the HTML.
- Within the 'HTML' tab, scroll down to the next paragraph (<p>) tag after the logo <img> tag.
- Remove the entire line that contains '<p>Guest WiFi</p>'
- Preview your changes in the 'Preview' tab.
Change the document page title
Custom HTML templates allow you to set a custom page title for your document. Let's change this from 'Guest WiFi' to 'Chicago Cafe'.
- Within the 'HTML' tab, locate the <title> tag within the <head> tag.
- Update the text to 'Chicago Cafe WiFi'.

-
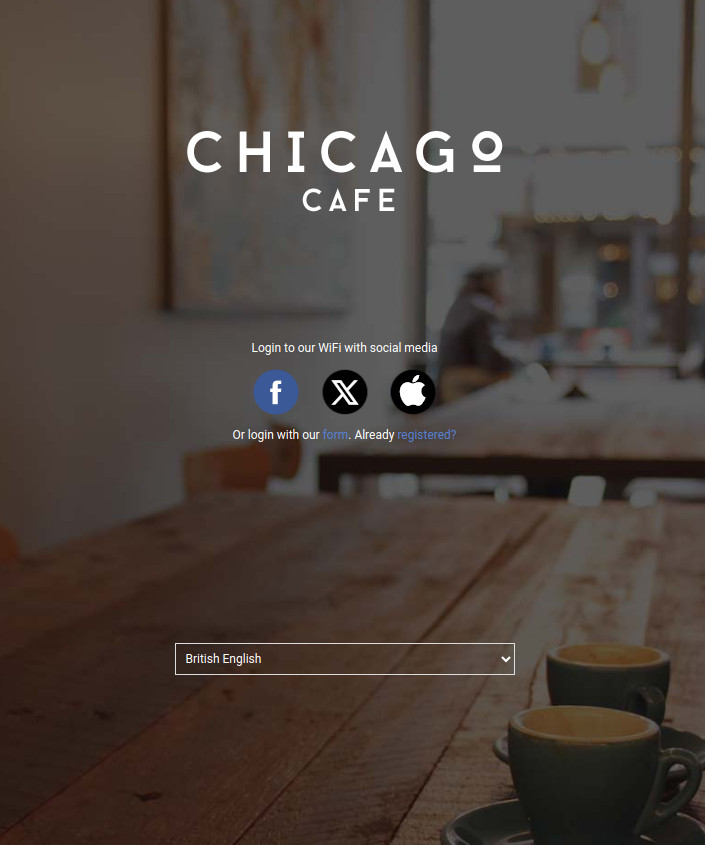
Add custom social media authentication buttons
Next we are going to add some custom social media authentication buttons for our visitors to authenticate with. By default the boilerplate design includes buttons for Facebook and X so we're going to customise these and add an extra button for Apple authentication.
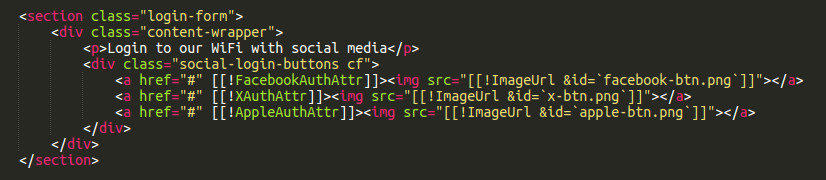
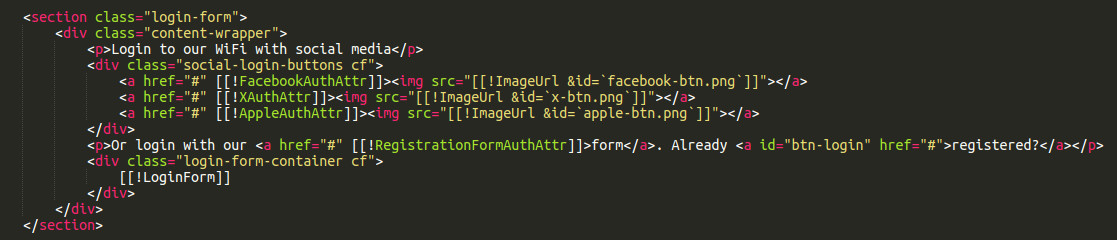
- Within the 'HTML' tab, locate the second <section> which has a class of 'login-form'.
- Replace the entire <section> element with the following HTML:
<section class="login-form">
    <div class="content-wrapper">
        <p>Login to our WiFi with social media</p>
        <div class="social-login-buttons cf">
            <a href="#"><img src="[[!ImageUrl &id=`facebook-btn.png`]]"></a>
            <a href="#"><img src="[[!ImageUrl &id=`x-btn.png`]]"></a>
            <a href="#"><img src="[[!ImageUrl &id=`apple-btn.png`]]"></a>
        </div>
    </div>
</section>
If you followed the 'First HTML changes' step then you should recognise the [[!ImageUrl]] snippet used to set the 'src' attribute for each of the <img> tags in our new buttons. The only difference here is that we have added the snippet codes manually rather than using the snippets library to embed the image url codes.
Click on the 'Preview' tab to preview your changes and you should see that the template now displays the 3 images as anchor links.
-
Use snippets to activate the social authentication buttons
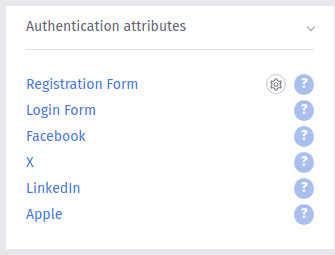
Our new buttons are currently inactive so the next step is to ensure that they trigger the social media authentication process for the relevant network when our visitors click on them. This can be achieved by adding 'Authentication attributes' to the anchor elements which will add a data attribute.
Navigate to the 'HTML' tab and repeat the following step for each of the three social media buttons.
- Place the cursor after the 'href' attribute of the <a> tag and add a single 'space'
- Locate and expand the 'Authentication attributes' section in the snippets library found to the right of the HTML code editor
- Click on the relevant 'Authentication attribute' network link (e.g. 'Facebook') to embed the snippet code at the cursor position


Your HTML markup should now look like this after repeating this process for each social network button:
If you now 'Preview' your changes you should be able to click on each button and initiate the social media authentication process for each network.
'Authentication attribute' snippets
'Authentication attribute' snippets embed a data attribute on an element which the boilerplate custom template JavaScript then uses to initiate the WiFi authentication process. You can embed these snippets on any element within your custom HTML to initate the WiFi authentication process for the relevant authentication method.
-
Add a registration form link and an embedded login form
We'll now add a link for our visitors to authenticate via the registration form and an embedded login form for registered visitors to log back in on return visits to our venue.
We will acheive this by adding a link to toggle the display of the login form, a snippet code of [[!LoginForm]] to embed the form and a link to initiate the authentication process via the registration form using the [[!RegistrationFormAuthAttr]] authentication attribute snippet.
-
Underneath the <div> containing the social media buttons add the following HTML markup:
<p>Or login with our <a href="#" [[!RegistrationFormAuthAttr]]>form</a>. Already <a id="btn-login" href="#">registered?</a></p>
<div class="login-form-container cf">
    [[!LoginForm]]
</div>
The <section> should now look like this:
If you 'Preview' your template you should now see the additional form links underneath the social media buttons.
You'll notice that the registration form will display in an overlay when you click on the 'form' text link. The JavaScript required to submit this form is already available in the template as part of the core boilerplate JavaScript and is embedded at run time.
You'll notice that nothing happens when you click on the 'Already registered?' link. In the next section we will add some custom JavaScript to toggle the display of our login form when this link is clicked by the visitor.
-
Underneath the <div> containing the social media buttons add the following HTML markup:
-
Add custom JavaScript
Your template will have JavaScript injected at run time to provide base functionality for the majority of snippet codes that are found in the snippet library (e.g. to submit boilerplate forms and handle errors and to initiate WiFi authentication for different authentication methods). However there maybe cases where you may want to add your own custom JavaScript code to add additional functionality or animation to your template.
We're now going to add some custom JavaScript to toggle the display of our login form when our 'Already registered?' link is clicked by the visitor. This JavaScript will toggle the visibility of the parent <div> element that contains the form.
- Click on the 'JavaScript' tab to edit the JavaScript for the template
-
Add the following jQuery code within the body of the document 'ready' event:
$('#btn-login').click(function(e) {
    e.preventDefault();
    $('.login-form-container').slideToggle(500);
});
Your custom JavaScript code should now look similar to this:

If you now 'Preview' your template and click on the 'Already registered?' link you should see that the login form display now toggles.

JavaScript
Your custom HTML template includes the jQuery JavaScript library by default so you are free to use 'vanilla' JavaScript or jQuery to add additional functionality to your design.
-
End of the guide
If you have followed all the steps in this guide then you should now have a functional custom HTML splash page template for 'Chicago Cafe' that you could apply to an Access Journey. Hopefully this guide has introduced you to some of the tools available to help you create your own custom HTML design and provided you with an understanding of how to use them.
-
Common questions and answers
Can I make my own custom HTML buttons or elements for social media and registration form authentication (e.g. Facebook, LinkedIn, WiFi registration form etc)?
Yes, you can make your own custom HTML to provide links for your visitors to authenticate via all authentication methods. You can also use custom CSS to style these elements via the 'CSS' code editor and upload custom images. See step 7 of this guide which provides an example of this.
Can I embed a registration form in my 'offline' template?
Yes, you can use the 'Authentication form' snippets to embed a registration, login or password reset form in your 'offline' template and use custom CSS to style them. Boilerplate JavaScript is added to the template at run time to provide base functionality for these snippets.
Can I add a menu or special offers to my custom splash page template?
Yes, you can create your own HTML markup and add your own CSS to create a menu, advertise special offers or for any other purpose.
Can I link to resources that I currently host on my website (e.g. images, video, pdf documents etc)?
Yes and No. It is not currently possible to link to images or other resources within 'offline' templates due to the visitors being within the 'captive portal' at this stage of the WiFi authentication process. With 'offline' templates it is possible to upload image files via the 'Images' tab and then use the 'Image' snippets to embed links to the uploaded images. With 'online' templates it is possible to embed links to resources hosted on external domains such as your own website or other content delivery networks. At this point the visitor is 'online' and outside of the 'captive portal' so it is possible to deliver these resources to the visitor's browser.
Can I make an animated, image slide show in my template?
Yes. You can create your own image slide show for a template by uploading your images, using the 'ImageUrl' snippet to embed links to the uploaded images and then creating your own custom CSS and JavaScript to generate the slideshow.
The standard splash page designer provides separate previews for 'mobile' and 'desktop' devices. Do custom HTML splash pages support each type of device?
Yes, but it is up to the template designer to implement a responsive design for both types of device. The boilerplate custom HTML features a responsive CSS design for both 'mobile' and 'desktop' devices that can be adapted to suit individual needs.
When creating a language version of an Access Journey that uses a custom HTML splash page template, does the custom HTML splash page template get machine translated into the new language?
No. Custom HTML splash pages are not currently machine translated when a langauge version is created for an Access Journey.
Custom HTML splash page templates - Quick start guide v1.1.1 (December 2023)